


After playing a little, I decided to share a bit of knowledge on this.
Important note: if possible work outside, otherwise in a well-ventilated room - bleach can give you a bad headache
and for bleach - use cheap brushes you won't care to lose
Step 1: Play around
Get your preferred mediums and always test them before actually using them!
Here, I tested multiple kinds of inks on the same piece of paper (180g), checked how they behave on both smooth and textured side. Then, upon drying, I slapped some bleach on them, to see how they react
usually it takes somewhere around 25 mins for it to fully react&dry

now I see I should be careful while working with acrylic inks - combined with bleach they crack the smooth side of paper!
Step 2: Use that knowledge for art
sub-step A:
Now, get that spare WIP that's been lying around for heck-knows-how-long and use it as a scapegoat
Jokes aside,
get the sketch and erase until barely visible
use the [non / barely] -reactive inks (in this case gel pens) and slap some lines for things you don't want to lose

and now
wet it, then ink it
start with brighter colors
slap multiple colors for even cooler background effects.
always mix darker inks at the end
and let it dry

yeah it ain't pretty for now
sub-step B:
now it becomes slightly more fun
get the bleach
start with 1 to 3 solution (1part bleach to 3 parts water)
the rule is
brush it then let it dry for 10-15mins
DO NOT OVERDO IT unless that's your intention (sometimes you do want the ultra-bright effect)
it can take some time before bleach fully reacts with ink, so BE PATIENT.
putting too much at once might result in too bright patches
and that's the magic
brush it, dry it, do it again multiple times
at some point you might want to reduce the bleach-water ratio or use just the bleach itself - for the extra brightness
once you're done, let it dry for about a day
here's my result, with some close ups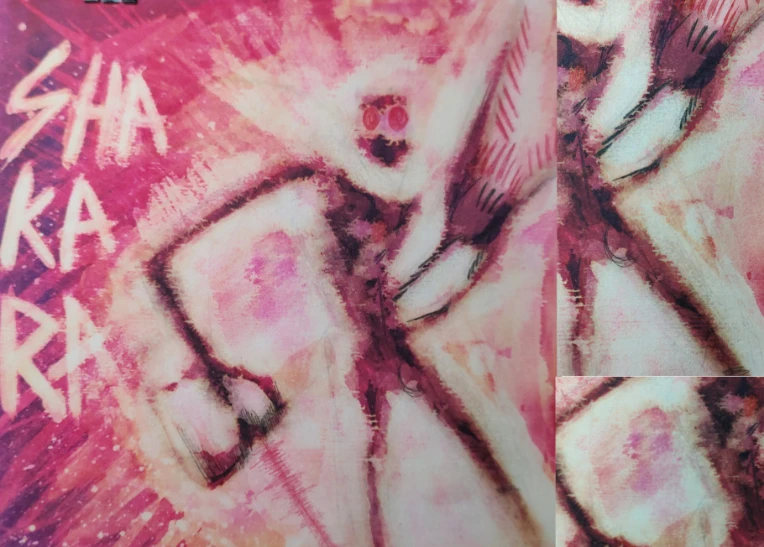
Step 3: FINISHING IT UP!
ADVICE: IF POSSIBLE, WORK ON THE COPY OF THE BLEACHED PIECE. scan it and copy-print it so you won't feel terrible if you ruin it, unfortunately my scanner only fits A4 size and this one's 29x29CM
here comes the tricky part. now this one almost fully depends on your style and desired results.
so I'll explain how I did it personally
first - started out with white gel pen for line art, then added some shadows with fineliner
then once again took out the red gel pen and re-did the important details
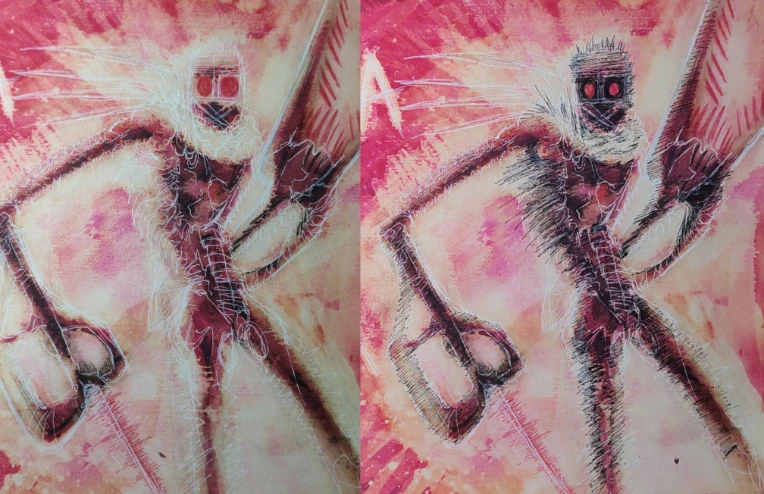
then, played around with thinner fineliner, white marker and white gel pen
until it looked good enough
I wanted to give it a grunge-y / experimental look
FINAL RESULTS
now go to the place with good light & take a good pic

character - Shakara (2000AD Comics)
mediums used - bleach, inks, gel pens
total time - with drying about ~3days